%20(2000%20x%201000%20px).png)
%20(1).png)
%20(1).png)
%20(1).png)
Search Results
428 results found with an empty search
- Our Lady Star of the Sea ~ Candle or Bottle Craft
I have always loved the ocean. Although I have never lived very close to the ocean, I have always (even as a child) enjoyed painting pictures of the ocean. I feel that God is portrayed so well in an image of the ocean: for God is unending, wide reaching and can be peaceful, yet powerful!! -For He is Almighty, and yet a loving Father! Have you ever heard the phrase ”Stella Maris”? That is Latin for ”Star of the Sea”. This name has been given to Our Lady. Many sailors have prayed to ”Stella Maris” to ask her to pray for protection. What a beautiful thought: Our Lady watching over theses men and women as she asks Jesus to calm the storms and give these faithful travelers safe passage across the wild waves in the ocean. Even as we travel through our daily lives we can ask Our Lady to intercede for us and ask Jesus to guide us and protect us as we journey on our way through life. For Mary’s love is a wide as the ocean and she would be willing to ask Jesus to help all those who have requested her intercession. Jesus will listen to His mother! I have created a craft that depicts Mary asking Jesus to protect travelers on the ocean. Our Lady Star of the Sea ~ Candle or Bottle Craft I made two versions of this craft. One is made from an old spaghetti sauce jar and holds a candle. The other is in a empty wine bottle. Depending on how you like to decorate, you may like one version over the other. You will need: a jar (wide mouth) or bottle (with cap) candle / tea light ~ if you are using a wide mouth jar sand (dry) small stones different sized sea shells Mod Podge and brush clear-glitter nail polish (optional) twine or raffia hot glue picture of Mary (click here) Print out the correct size image to fit the bottle/jar you are using. Cut out the image and place it in a sheet of scrap paper. Using a brush, lightly cover the front of the image with Mod Podge. Place the image face-side against the bottle. Be sure to pay attention to the bottle’s seams. The seams should be on ether side of the image (So you can see the image clearly.) Press the image down onto the bottle. Start pressing from the middle of the image out to the edges, so you don’t get air bubbles. Then you can roll the bottle over a folded towel to help press the image down. Now you are ready to cover the back of the image with Mod Podge. Cover the whole image and the very edge of the image. This will help to hold it in place and seal it. Allow that to dry. Once the Mod Podge is dry you can add a little glitter nail polish to the edge of the image. This is optional. I just liked the look it created. Plus it helped to insure the image doesn’t peel away from the bottle. Then I added some twine to the neck of the wine bottle. (as pictured) I wrapped the twine around the wide mouth jar several times to cover the ridges in the glass cap area. After I added the twine, I hot glued an arrangement of shells and a medal on to the twine. A Stella Maris medal would be great!! I added a little glitter nail polish on my shells to make them glitter, too. Now it\’s time to add the sand! I rolled up a sheet of paper to make a funnel and I poured in about a cup of sand. This will create dust inside jars with tall necks, like a wine bottle. This dust will eventually settle, but some may rest to the sides of the jar. This dust can be wiped off with a long bent stick (I used a bent skewer) Tape a piece of tissue to the end of the stick. The spaghetti sauce jars didn’t seem to collect the dust so this won\’t be necessary if you are using a wide mouth jar. Then add your candle (if you are using a wide mouth jar), stones, and shells. You will need a long lighter or a lighting stick to light your candle. Don\’t forget to put the cap/cork on your wine bottle! Our Lady Star of the Sea, Pray for us! Ask Jesus to protect us in times of hardship and keep us in His care.
- Holy Eucharist - Perler Bead Pattern
Here’s a new Perler melting bead pattern! It’s the Holy Eucharist, chalice and grapes. Download this pattern ! Download the Perler Bead Pattern here: They are great projects to keep kids busy!! Hope you are all having a great summer! God bless! ~Jen-Marie
- A Baptism Celebration {For Our Lord and Baptism Anniversaries}
The Feast of the Baptism of Our Lord is an extra special day at our house. Not only is it the feast of Our Lord’s Baptism, it is also the anniversary of our son Joshua’s baptism. He shares this special day with Our Lord. Eleven years ago, we told my husband’s uncle, who is a deacon, that we wanted to have our newborn baby boy baptized on the first available Sunday. And the first available Sunday happened to be Jan. 12 the feast of Our Lord’s Baptism. We thought that was wonderful, especially since Joshua was one day shy of celebrating the same birthday as Jesus! 🙂 Here at our house we celebrate baptism anniversaries like birthdays – but without the gifts. After all, the day we were “born” into God’s family is a VERY important day! So we had a party to celebrate Jesus’ baptism, as well as, Joshua’s. When we celebrate the kids’ Baptism Anniversaries, we don’t have lit candles on a cake like you would on a birthday cake. Instead we have the kids light a votive candle at Church. So this morning, Joshua lit his own little candle after Mass. It’s a simple family tradition, but if our children’s Baptism Anniversaries don’t fall on a Sunday, we just have the child light the candle on the Sunday closest to the Baptism Anniversary. I’d prefer to go to daily Mass on that special day so they can light the candle, but sadly life is often too crazy and we can’t get to weekday Mass. Later, at home, we had a small party. My oldest daughter made cupcakes and I made the decorations. Elizabeth and Rebekah helped to decorate. And it all looked so sweet! Download the Holy Spirit Drops Here: For best results I recommend printing these onto photo paper. The images made very nice cupcake toppers and party decorations! Just print the PDF out, cut out the images, and tape them to strips of ribbon to make decorations. Or you can tape them to the top half of toothpicks to create cupcake toppers. They can be stuck in the tops of cheese cubes or sandwiches, too. It’s so easy and yummy! Here at our house, cupcakes are a special treat! All the kids love them! Now if only my 2 year old, Caleb, could figure out the difference between cupcakes and muffins! He just can’t seem to figure out what the difference is between them. So after having mom correct him time after time he invented his own word: “Cupkins”!! (That’s a mix between the words “cupcake” and “muffin”.) Now that was smart, I can’t correct him anymore! And why would I want to stop him from saying such a cute made-up word!? 🙂 Everyone thinks Caleb’s creativity is sooo cute, but my older kids sure don’t like my cupcake-creativity! They think I’m crazy for eating my cupcake like this: I think it’s the best way to eat a cupcake! First, I rip off the bottom of the cupcake and I place the bottom (up-side-down) on top the icing. That creates a cake sandwich with the icing in the middle. It’s less messy that way. Otherwise, I might look more like Caleb does in the picture above! 🙂 But my teens seem to think that I’m a lunatic for eating cupcakes that way! Oh, well, I guess I might grow out of it someday! But I didn’t today! 🙂 God bless you all and I hope you have a wonderful week! ~JenMarie
- St. Lucy ~ Coloring Page
Here is a St. Lucy coloring page my oldest daughter, Rachel, created for her younger sisters. I thought she did a beautiful job!! She is becoming quite the artist! 🙂 Download the coloring page here: All thanks goes to Rachel for sharing her talents and taking the time to create this cute coloring page! Hope you have a wonderful day! ~JenMarie
- Snow Mary and Grotto
I was about to share this on my family blog, but then I thought you all might like to see it here, since it is a Catholic inspired idea…Over the past few days, we were blessed with over 18 inches of snow. My oldest daughter, Rachel, and a few of my younger daughters, Elizabeth, Hannah, and Abby, made this amazing Mary and grotto out of snow! The grotto stands about 5 feet high! I think Mary looks cuter in real life than she does in this photo. It can be so hard to get a good picture of snow. The girls also made snow-flowers and put them at Mary’s feet along with a few evergreen branches. I was shocked when I looked out my window and saw this huge grotto in the yard! They did an amazing job! I asked Rachel if they could make it again with concrete, because I’ll be so sad to see this melt. Although I sure am looking forward to spring! Personal Update: I really don’t have an update. But since some of you were asking if everything is okay, I thought I’d let you know that I was unable to get to the doctor’s yesterday (Friday) due to the snow. The doctor was going to tell me the results of the test, but the appointment was postponed till Monday. Hopefully we won’t get any snow on Monday, too! Yup, I’m soooo ready for spring! Have a blessed day! ~JenMarie
- St. Valentine's Day Thankful Project
Teach kids a lesson on how to become happy! This worksheet I made to help kids focus on thankfulness. The title of the page was “A Thankful Heart is a Happy Heart.” The page is a great project for St. Valentine’s Day or any day!! With this worksheet, kids can write what they are thankful for on the main page. If you are using this for St. Valentine’s Day, I think it would be nice to focus on those who the kids love and are thankful for. They can decorate around the list if they like. This image sample is from a past post. The St. Valentine’s day list could be people the kids love and are thankful for. Then, they can colored and cut out the “happy” heart and stapled it to the main page. Create flaps that open to reveal the things the child is thankful for. This printable activity is free! Download this St. Valentine's Day Happy Heart Page here: This Happy Hearts Page has a Thanksgiving Version . If you would like to download those pages they are available in this post: Click Here. Have a blessed day, everyone! ~Jen-Marie
- Responsibility Chart for Catholic Kids {Chore Chart}
I wanted to share a child’s responsibility chart that I made for my younger kids. It’s not exactly “Catholic” except for the prayer section, but since I feel prayer is the most important part of this chart I thought some of my fellow Catholic moms might like to see and maybe even use it. Yes, I called it a responsibility chart, but you could also call it a chore chart. Personally, I think the word “chore” sounds so unfriendly compared to “responsibility”, but you are welcome to call it a “chore chart” if you want! 😉 If you think that name change was bad, you should hear some of the titles we say to replace the word “school”!! My kids grumbled at me one day when I said “Time for school.” So to make them laugh I started trying to make up titles to use instead of “school”. It made them laugh for a day, not so much anymore. What do you think of these new titles for school? – “Learning Love”, “Brain Juice”, “Mental Enhancement”, “Educational Play” and my personal favorite, “Anti-Starvation Preparation” (That one is referring to getting a job when they are older so they can buy food.). Sorry for the tangent, back to the chart … I tried to make this chart usable for kids who are not able to read. So I have a picture for each section to help remind the kids what they should do. That way they don’t need to ask me to read it each time they look at it. The chart includes: combing hair, making bed, brushing teeth, praying, general clean-up and much more! I also have listed “Read with reading buddy.” which is just a reminder to have my older kids read with the younger kids. My kids each have a “reading buddy” – that makes things a little easier on me. But if you only have young kids then mom, dad, and/or grandma can be the child’s “reading buddy”.As for the school section on the chart, (Yes, I titled it “school” not “Educational Play”) I have extra charts just for school subjects that the kids refer to. The younger kids’ school chart includes simple concepts like colors and letters, while the older kids’ charts have more advanced topics like reading and math. I laminated these for my kids, one for each -except my older kids. Yes, of course, I expect my older kids to comb their hair, pick up their toys, etc. – I just didn’t make them a chart for it! Although some days I think I need to! 😉 After the chart was laminated I added magnets to the back so we could hang them on the fridge! That works really well for us! We use a dry erase marker to check off what they have completed each day. Download the Chore Chart Here: Dry erase marker typically wipes off easily, but if your laminated sheets begin to get messy looking from the dry erase markers, just use a napkin and a few drops of rubbing alcohol to wipe the sheet off. That will normally make it look almost like new! Personal Update: SHOCKING NEWS! I did get to the doctor to get the test results about the lump/cyst which they removed last week. I’m not sure if the news is good or bad, but it was NOT something I wanted to hear. I have endometreosis ! I was truly shocked! Well, it could be a lot worse, but sadly, my pain is not going away anytime soon. It looks like I’ll just need to figure out a how to live with it. Thank you, everyone, for your prayers, comments, emails, and support! It has been so nice knowing I have such a great group of people praying for me and supporting me on this journey. Thank you, again. ~JenMarie
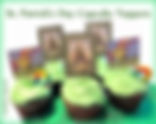
- Cupcake Toppers for St. Patrick's Day
Add a little Catholic flare to your St. Patrick’s day treats! Yes, I know it’s Lent, but how can you not celebrate such a great saint!! Actually, since St. Patrick’s Day falls so close to Sunday this year we are holding our celebration on Sunday – just so we can still stick with our Lenten sacrifices. Here are two different cupcake toppers to help decorate at your celebration, too!! Notice the cute little rainbows? They are just a few mini candy canes that we had leftover from Christmas. I stuck them into the cupcake to form the rainbow! The kids thought it was hilarious! The paper cupcake toppers are easy to make. Just cut out the images from the printable and tape the top half of a toothpick to the back. Then stick the bottom half of the toothpick into the cupcake! Easy fun! Download this style here: Download the rainbow Style Here: Hope you all a have a blessed Week! ~Jen-Marie
- St. Joseph Altar {Getting Started}
Around this time of year Catholic websites and blogs seem to be flooded with pictures of gorgeous St. Joseph Altars! Personally, our family’s celebrations on St. Joseph’s day are not so elaborate or extravagant! But since St. Joseph is one of my favorite saints, I would love to honor him in an extra special way. I have been searching the web for an easy to follow guide on how to make a St. Joseph’s Altar. I had so many questions: How do you make one? What should be on it? Where did this tradition come from? Well, the best resource I found was St. Joseph’s Virtual Altar . See this beautiful altar HERE A little Background to the St. Joseph Altar: I learned that the tradition of a St. Joseph’s Altar is ages old and started in Sicily after the people prayed to St. Joseph to intercede for them. They prayed for an end to a horrible famine that was plaguing them. After their prayers were answered, they made wonderful altars to honor St. Joseph to thank him for his help. Every year on His feast day they continued to honor him and create beautiful altars filled with a feast of artistically designed food. Then, when everyone had all they could eat, the rest of the food was given to the poor! Here are some ideas I found for creating an altar: 3 Tiers (steps) : The base of the altar has three tiers to symbolize the Holy Trinity. The 3 tears can be made by added steps of boxes to a table top, then drape a clothe over it and the table. Their are countless ways to make 3 tiers; here is another way by Homeschool Goodies . Statue or Picture of St. Joseph at the top. Don’t be afraid to add images or statues of Jesus or Mary, of other saints, too! If you don’t have a statue or image of St. Joseph you can print one from the internet. HERE is a image I have on a past post. Candles – Candles can be scary with kids around so if you don’t feel comfortable with real candles buy some electric candles or make some fake candles. Flowers – Lilies are a symbol of St. Joseph, but any flowers will work. If you can’t buy real flowers, consider artificial flowers, or make some paper lilies Fresh Fruit – pineapples, oranges, bananas, apples, grapes, etc. – lots of produce to show the abundance of food and the end to the Sicilian famine. Wine as a symbol of the Wedding at Cana. Bottled water might be good to go with the wine or in place of the wine, if needed. Shaped Breads and Pastries – Bake the bread and pasties in symbolic shapes like: a staff, lilies, saw, hammer, Sacred and Immaculate Hearts, doves, Bible, monstrances, crown of thorns, chalice and hosts, crosses, fish, lambs, palms, decorative wreaths, angels, wings, etc. I’m sure my kids will enjoy helping with this. They are very creative with play-doh! (See recipe below) 12 whole Fish for the 12 Apostles – That sounds really neat, but I don’t think I could get my kids to eat whole fish, so I plan to make tuna balls and shape them into fish instead of balls! That way we can still have our 12 “whole” fish. And the kids will LOVE to eat those! Goldfish crackers might be a good idea, too! Prayer Intentions – Add a basket to the altar so everyone can write prayer intentions on small slips of paper and add them to the basket. Names or Images of Our Friends and Relieves Who Have Died . St. Joseph is the patron of a happy death we ask that St. Joseph help these souls enter into heaven if they are in purgatory. Fava Beans: During the famine the peasants began to eat fava beans which were often fed to the cows. I have a few fava bean recipe links below, or if you like you can just display some beans on the altar. Meatless foods: The food is typically meatless because the Sicilian peasants rarely had meat. It’s also Lent, so it’s still a time of fasting. (We plan to have fava food and tuna balls .) Sawdust or cracker crumbs in a bowl : This symbolizes the saw dust of St. Joseph’s workshop – I like the cracker crumbs since we plan to make fava soup! 😉 Last but not least: Goodie Bags ! These are filled with treats, a metal, prayer cards and other holy items. A “good luck” fava bean is often put in the goodie bags, but I personally dislike the idea of a “good luck bean” because children can assume that it’s a charm and has power, but as we know, God has ultimate power! Well that’s a quick list, I think I hit everything! If you see anything I forgot, let me know and I’ll add it to the list. Now, I want to share a few fava recipes I found: Fava Beans with Garlic Fava Bean Breakfast Spread Fava Bean & Corn Salad with Fresh Mint Fava Bean Salad (with Almonds) (minus the almonds -do to allergies) Spring Salad with Fava Beans Fava Bean Salad (with tomato and cucumber) Fava Bean Soup Pureed Fava Bean Soup Fava Bean Soup Recipe Fava Bean Soup (minus the bacon) These are just a few I thought I might be able to use here at our house, but feel free to Google “fava recipes” to find more! Here is an edible flat bread recipe that my kids and I have used in the past to make fun shaped bread for school projects. Flat Bread 4 cups flour (whole wheat, white, or both-mixed) 1 tsp salt 1 tsp baking powder 1 stick of butter -soften 1 1/2 cup water Mix dry ingredients together. Cut in butter and mix together. Add one cup of water, mix well and then add additional 1/2 cup water. Stir till it starts to take form. Use hands to kneed it and make shapes. (Don’t over kneed – kids love to over-kneed.) You could roll this out and use cookie cutter if you desire. Bake on buttered cookie sheet at 350 for 10 to 20 minutes -depending on the size of your shapes. Don’t let this intimidate you!! Download this PDF to help you as you prepare. I’m adding a lot of ideas here, but please pick just a few to start! Don’t feel you have to do it all. Each family has different ways of doing things so choose what works best for you and your situation. Here is a list of a few St. Joseph altars made by other bloggers. These are very simple and easy to do. Take a look and see if they help inspire you! JOY{filled} Family Homespun Love Happy Catholic Home My Domestic Church Flowing Streams A Slice of Smith Life Waltzing Matilda Shower of Roses These blogs all have beautiful examples of simple yet elegant altars! I collected a few ideas from some of these ladies, too. Thank you, ladies for helping to spread the faith! Did you post about your St. Joseph Altar? Please, feel free to leave the web-address in the comments below. I’d love to see it! Okay, well, that’s a quick run-down of what I learned about making a St. Joseph’s Day Altar. I’m planning to set up our altar during the day on March 19th and have it ready for our evening meal – so the whole family can be there! Download this information to help you prepare. Blessings to you all and may your St, Joseph’s day planning be blessed with joy that brings you and your family closer to God. ~Jen-Marie Oh, I almost forgot… Here is a “ Blessing of the St. Joseph Altar ” prayer on Catholic Culture!
- Wood and Saw Cake for St. Joseph!
Here is a fun and easy cake to make for St. Joseph’s Feast day! I “saw” this cake over at Coolest Birthday Cakes and thought it would make a great cake for St. Joseph’s day! To create a cake like this, just make a regular chocolate cake in a 13 x 9 inch pan. Once it’s cooled, cut it in-half longways. Place one part on top of the other -spreading a little chocolate icing in the middle to keep them together. I used one container of white icing mixed with about 1/2 cup to 1 cup of peanut butter and a few spoonfuls of chocolate icing to create the tan colored icing. (Too much peanut butter will make the icing VERY thick) Then I covered the cake with that icing mixture. Next, I added strips of chocolate icing to the peanut butter mixed icing. This will create the wood look. Make some straight lines and one or two “U” shaped lines. I dabbed the short ends with chocolate icing to look more like cut wood. Download for the instructions and saw image: To create the “saw” I cut shapes from gray and brown paper. Then I laminated so it would with-stand the moisture from the icing. This saw is about 1 foot long. Or download the PDF Instructions with a saw image - above. Last but not least, stick the saw into the cake! If you are skilled at fondant icing I’m sure you could decorate the cake with that and make this cake even cooler!! 😉 Blessings to you all! ~Jen-Marie
- Our St. Joseph Altar {2014}
A few days ago I shared a list of things that are traditionally placed on a St. Joseph Altar – HERE . Today I want to share the altar our family made to celebrate the Feast day of St. Joseph! This is our first year making an altar, and this is the completed altar. This is what is under the clothe: It’s a small end-stand, a wooden crate, and our table. St. Joseph is on the top with lots of flowers and a candle. I placed the bird nest there as a reminder of the swallows of Capistrano! Here is a cute children’s book about the Swallows: The swallows return to Capistrano every year on March 19th! Here is the shaped flat bread; made by Elizabeth (She turned 10 today!! – and she’s proud to share the day with St. Joseph), Hannah (age 8), and myself. This is our second tier on the altar. Prayer Intention Basket Sawdust – Cracker crumbs – Which were good with our soup! Our ”whole” fish which were made with the Tuna Ball Recipe . Our yummy cake shaped like a piece of wood and a saw! I have posted instructions to make this cake HERE . All went well for our first year of creating an altar! We are all looking forward to next year! Hope you all had a blessed day!!
- Tea with the Blessed Mother
Hi Everyone! I LOVE May! It’s so beautiful! The flowers, the trees, the sunshine and NO snow to shovel!! It’s just so nice! Aside from being a beautiful month it’s also the month that God placed me into the arms of my mother, and it’s the month that God adopted me as His daughter! Yes, I love May! One of the best parts of May are all the Marian events, because May is Mary’s month! A few years ago, my daughters (all 6 of them) and I decided Mother’s Day was a perfect day to have a fun little tea party in honor of our special mother, Mary. We called it, “Tea with the Blessed Mother”. While we like to do a few small things for most of the Liturgical Year’s Feast days, we often like to make our “Tea with the Blessed Mother” an extra special party! We have tea (or hot chocolate for the non-tea-lovers), Marian themed treats, Marian crafts, we make a BIG Mary altar, and we have lots and lots of decorations! We also invite the Grandmothers, too. My girls LOVE it! It’s a fun Mother’s Day event! If you are planning to have a nice party for Our Lady, here are a few of the things we do. – These are older photos — I wanted to post this two years ago, but as much as I love May, it’s also the busies month for me. I’m wrapping up the school year and getting portfolios ready to send to our evaluator and school district. So, these ideas and files are ones we have used for several years now, and my girls seem to think of them as family traditions…. The Invitations: I “send” my girls invitations, they think it’s so neat! The excitement they show is more fun than the actual party! These are the invitations I “sent” to my daughters the past two years…. They are made with a card that I created, an 8 inch paper doily, and some curling ribbon. I recommend printing these onto stock paper or photo, but regular paper is okay. Download Tea Party Invitations and Tea Pot and Cup Décor: Decorations: A Mary Altar is a MUST! You can’t have a Mothers Day Tea Party without our Most Holy Mother!! This is our altar from two years ago. It was made using a mosquito canopy, fancy ribbons, strings of pearls, white roses, and large drop gem beads. Read more and see more pictures HERE . We also have a little Crowning for Our Lady. Learn to make a floral crown for Our Lady HERE . Here are a few “mini altars” that we had sitting around the dining tables and serving tables: I drew a few teapot and teacup pictures to use as decorations around the dinning room. They looked cute along the streamers and ribbons! The teapot has a small Immaculate Heart on the design! Download above. Here are a few pictures: The pot and cups are taped on a oblong paper doily and “fun-tacked” to the wall. The bow is made from purple paper and the teapot and cups were printed onto purple paper. The decoration in the picture above was created with the teapot/cup download, some tape and curing ribbon. I taped about 6 to 8 strands of ribbon to the teapot spout (on the back) and taped the cups to some of the ribbon strands. My girls added the “tea” color to the cups with a colored pencil. The colored teapots and cups above were simply printed on to colored paper. These cups may make great place-cards, too! I took all these pictures from the leftovers we had from last year. I hope to have nicer pictures after our party next Sunday. But I wanted to get this out so those who wanted to use them would have the chance to use them this May. Marian Crafts: Check out all the post about Our Lady HERE My girls and I are looking forward to our Mother’s Day tea party with Our Mother Mary! I hope all these ideas help you to share the love of Our Lady! Have a blessed May! ~JenMarie