Search Results
428 results found with an empty search
- St. Lucy ~ Coloring Page
Here is a St. Lucy coloring page my oldest daughter, Rachel, created for her younger sisters. I thought she did a beautiful job!! She is becoming quite the artist! 🙂 Download the coloring page here: All thanks goes to Rachel for sharing her talents and taking the time to create this cute coloring page! Hope you have a wonderful day! ~JenMarie
- Sparkly Homemade Christmas Ornaments {little mess and recycling cards}
I hope you all had a blessed Christmas Day! Our family had a lovely day with lots of sweets! I\’m sure a few of my upcoming posts may seem a little out dated for those of you who don\’t celebrate Christmas past the 25th of December, but here at our house we celebrate all 12 days of Christmas. We create a huge amount of our Christmas crafts and treats, from Christmas-eve until the Epiphany (Jan. 6). So, if these seem out dated because you are packing away the tree, feel free to just bookmark or pin these posts for next year! On Christmas Eve, my kids and I made a few homemade ornaments from glitter foam and old Christmas cards (from last year). It was very easy and fun for the kids and we loved the sparkly glitter foam, which made very little mess. The kids gave a few away to relatives on Christmas and hung the rest on our Christmas tree. To make these ornaments we glued a few religious pictures on glitter foam using regular white glue. You may need to hold the picture down for a minute if it wants to curl. Then we used silver glitter glue to trim the edges of the pictures. After that we added a few glitter star shapes to the edges. The stars we used were similar to these . After the glitter glue dried we poking a hook through the foam and hung them on our tree! They turned out so nice and sparkly, and they were very easy to make! So, keep those old cards and make a few ornaments next year! Please, pray for me I’m always in need of prayers. ~JenMarie
- Nativity Art Made With Colored Paper
Ya know, every year during Advent, life gets busier and busier. I have a growing number of students in my homeschool class and that just makes life a little more crazy. I’m trying to keep the focus on Jesus and giving to the needy, but I still feel like the season is almost over and I was barely was able to take the time to meditate on the true meaning of the season! Personally, my mediation and prayer time is always filled with interruptions and a two year old who jumps on my back or slams his affectionate body into my stomach, while screaming, ”Hug!!”, in a long drug-out word! Sweet, but very distracting. So sitting and praying is often not the peaceful time in my day. Prayer in the bathroom is as peaceful as it gets – assuming I can sneak away without being seen! Otherwise, I hear banging on the door while my wild and crazy fan club screams on the other side! So prayer time is rather difficult most days. I found that prayer time can be more meaningful if I’m working on something. For starters, my kids bother me less when they see me actively doing something. Why it’s that way I have no idea! But I like to use it to my advantage! And secondly, I find it easier to focus on prayer and mediation when I’m working with my hands. Creating, coloring, painting, drawing, and other things like that. Growing up I was told by my teachers that you should be focusing on prayer and not be doing other things while praying, but as an adult, I find that even my kids pray better in motion. My kids, mainly my oldest son, wants to walk while praying the Rosary! So maybe it’s a genetic thing in my family or maybe it’s just because God made us all different, but it works for me! Well, that may have been a bit of a personal tangent, but I was thinking about it as I made the craft that I’m about to share. While making this art project sample for my kids, I began to realize why I enjoy creating things and I was having a splendid time meditating on the birth of Jesus! I created this to show it to my kids so they can make their own as a school art project. I love when I can combine a little Religious Ed., Bible Ed and/or catechism with art class! 🙂 You will need: colored/construction paper black, white, light blue, brown, green, yellow, and if possible: dark blue, red Amazon has all these colors in one pack and it’s a really good price! ($1.39 for 50! – Ya, I like cheap!) crayons scissors glue (If possible both white glue and a glue stick ) 3 popsicle sticks or other sticks to make a trim for stable(You can buy the popsicle sticks at the dollar store 100/per pack but if you need a lot Amazon has 1,000 for $5) First I broke a popsicle stick in half and glued the two whole sticks and the two parts onto the brown paper. Create a stable shape. Then let that dry a little and cut the stable out, as pictured above. Glue that stable onto the black paper: Now using your blue, green, and brown paper cut a half oval shapes to make the bodies of Mary, Joseph and a Shepherd. You can also cut our half oval shapes to make a veil/head covering, too. Baby Jesus is a small oval shape. Use white paper to make circles to use as the heads. I used a peach crayon to make the white paper a skin color. I also used brown to make St. Joseph’s head covering to be a darker brown. Cut some yellow paper into strips to make the hay. You may also cut out staffs for St. Joseph and the shepherd. I also cut out yellow paper halos (not pictured) for the Holy Family and colored them with orange and red. (The other parts pictured above are for a tree… I’ll talk about that later.) You may like to wait till you have the ground and hills glued down before you glue on the hay and people. The image above shows the parts and the way I formed a star. It’s two long diamond shapes and 4 long triangle shapes. The were layered to make a star. I glued them above the stable in the black sky. Next I made a few hills to fit around the stable. I used a black and/or brown crayon to lightly color the bottom of each hill. I added yellow to the top and a small edge of white to the very top of each. This helped to give the hills some dimension. Once I had the ground/hill glued down in front of the stable, I glued down Mary, Joseph, the hay, and baby Jesus. After I glued down all my hills with the glue stick, I flip the picture over and cut off the extra edges of the hills. The shepherd and the sheep were added next. The image above shows how I created the sheep with white and black paper. Once I created the sheep and the shepherd I glued them onto the picture. Next, I added the trees. I made several green triangles and a brown trunk for each. I layered the green triangles starting from the bottom (at the trunk) and working to the top. The last and final touch is the other stars in the sky! Using a white crayon I made small dots all over the black sky. There you have it! The art work above was created by my daughter, Elizabeth, and my son, Joshua. A great team project! They worked together very well and it looks so sweet! Easy version for younger kids: If you are looking for something super simple you can make one like my younger kids made. It’s just the stable and the Holy Family! If you liked this you may also like this post : Have a blessed O Antiphon! Christmas is coming fast! ~JenMarie
- UV Light - White Glove Performances for Youth Groups
Youth groups?! No, I don’t run a youth group, but if you look around my house you would think I run a daycare! So why do I care about ideas for youth groups? Well, a few years ago my oldest two daughters were looking forward to joining our parish youth group, but our parish youth ministry fell apart the same year that my oldest was old enough to join! Bummer – what horrible luck. I was asked if I was interested in helping to keep the group running, since I had the only kids in the parish that were willing to show up to the meetings, but I decided against it. You see, we attend Mass at a ”dying parish”. In other words, most of our parishioners are retirement age. There are very few kids in the parish and there are even less teens. It’s hard to keep a youth group running in a parish with such few youth. Plus, at the time when I was asked to help, I was very pregnant with our 9th baby, and I felt like a beached whale. I already had a full plate. But that doesn't mean I never plan to try my hand at running or helping with a youth group. I hope that in the future when my youngest few kids are old enough to be easily managed I’d like to start our parish youth group again or maybe join in with the youth group that is available in a neighboring parish, which is 45 minutes from our home. So I’d like to start posting some ideas that I feel may be helpful ideas for youth ministry. That way if I ever have an opportunity to help with a teen group I can look back through some of these ideas as a reminder of past thoughts. And I don’t think you’ll mind gaining a few ideas for your youth ministry, school, or homeschooling group, too. I stumbled onto a video on YouTube while I was trying to look up a song my kids liked on our local Christian Radio Station. When I saw this I immediately thought ”WOW, that is sooo cool!!” (Is it still okay to use the word ’cool’?) ”This would make an awesome youth group project!” After I saw this one, I found LOTS more on YouTube from other groups! They are really amazing you should check them out! There are a number of videos on YouTube which show other groups’ performances! They are all amazing! So how did they do it? The kids all wear black, from head to toe, BUT they wear white gloves. Then they stand in front of a black background in a dark room. An ultraviolet fluorescent light (A.K.A. black light) is strategically placed in front of them facing up. Some groups recommended placing a second light above facing down. These lights need to be positioned so you only see the white gloves reflecting the light. Now the kids need to come-up with hand signs to put together during a song. And practice, practice, practice! I asked a former electrical purchaser (now Electrical Project Manger) ,whom I’m married to, where to buy these UV lights and he said they can be found at any electrical shop or on-line. This is a great way for teens to preform and raise funds for pilgrimages or trips. Is your youth group looking for a fun new way to raise money to take a trip to the next World Youth Day? Or maybe it could be a nice way to get the kids to preform for local retirement homes as a service project. So get your group all decked-out in black garb and take the white gloves for a spin! This looks like it could be as much fun to create as it is to watch!! Have a blessed day! ~JenMarie
- Gingerbread Stable and Nativity
I think gingerbread houses are fun, so I bought a pre-made kit that included the house parts and the icing. I thought it would be fun for the kids to help make a gingerbread house! But then I read this post at Mrs.Domestic Bliss about creating a Gingerbread Nativity and I thought that was the best idea! So we made a gingerbread stable and added a small plastic nativity! It was our Christmas table display and it looked so cute –that is until we ate it! 🙂(No, we didn’t eat the plastic Nativity figures – although, my 2 year old would have!) The kit made this easy! All we had to do was cut out half an oval into one of the peeked ends of the house. Yes, this was a delicate job which I did while the kids watched with wide eyes. My 4 youngest daughters took turns saying, ”Carefully, mom, carefully!”, as they watched me saw into the gingerbread with a knife. Then I assembled the house as instructed in the box. We did add the Nativity pieces and hay to the inside of the stable before we added the roof. Our hay was actually yellow coconut. You can create the yellow coconut by placing a few handfuls of coconut into a seal-able bag along with a few drops of yellow food coloring. Then shake it until all the coconut is yellow. The little Nativity which I used was one that my grandmother gave me when I was young. I saw one on Amazon that looked like it might work for this… here . But any small set would work. Or you could used printed and laminated pictures of the Nativity figures and stand them with glops of icing. I bought the gingerbread kit at AC Moore (with a coupon). It looks similar to this one on Amazon (but AC Moore was MUCH cheaper). Here is another one, too. We loved this and we hope to make one again next Christmas!! Although I think we might get a little more creative with the design! Christmas blessings to you all! Please, pray for me! ~JenMarie
- A Baptism Celebration {For Our Lord and Baptism Anniversaries}
The Feast of the Baptism of Our Lord is an extra special day at our house. Not only is it the feast of Our Lord’s Baptism, it is also the anniversary of our son Joshua’s baptism. He shares this special day with Our Lord. Eleven years ago, we told my husband’s uncle, who is a deacon, that we wanted to have our newborn baby boy baptized on the first available Sunday. And the first available Sunday happened to be Jan. 12 the feast of Our Lord’s Baptism. We thought that was wonderful, especially since Joshua was one day shy of celebrating the same birthday as Jesus! 🙂 Here at our house we celebrate baptism anniversaries like birthdays – but without the gifts. After all, the day we were “born” into God’s family is a VERY important day! So we had a party to celebrate Jesus’ baptism, as well as, Joshua’s. When we celebrate the kids’ Baptism Anniversaries, we don’t have lit candles on a cake like you would on a birthday cake. Instead we have the kids light a votive candle at Church. So this morning, Joshua lit his own little candle after Mass. It’s a simple family tradition, but if our children’s Baptism Anniversaries don’t fall on a Sunday, we just have the child light the candle on the Sunday closest to the Baptism Anniversary. I’d prefer to go to daily Mass on that special day so they can light the candle, but sadly life is often too crazy and we can’t get to weekday Mass. Later, at home, we had a small party. My oldest daughter made cupcakes and I made the decorations. Elizabeth and Rebekah helped to decorate. And it all looked so sweet! Download the Holy Spirit Drops Here: For best results I recommend printing these onto photo paper. The images made very nice cupcake toppers and party decorations! Just print the PDF out, cut out the images, and tape them to strips of ribbon to make decorations. Or you can tape them to the top half of toothpicks to create cupcake toppers. They can be stuck in the tops of cheese cubes or sandwiches, too. It’s so easy and yummy! Here at our house, cupcakes are a special treat! All the kids love them! Now if only my 2 year old, Caleb, could figure out the difference between cupcakes and muffins! He just can’t seem to figure out what the difference is between them. So after having mom correct him time after time he invented his own word: “Cupkins”!! (That’s a mix between the words “cupcake” and “muffin”.) Now that was smart, I can’t correct him anymore! And why would I want to stop him from saying such a cute made-up word!? 🙂 Everyone thinks Caleb’s creativity is sooo cute, but my older kids sure don’t like my cupcake-creativity! They think I’m crazy for eating my cupcake like this: I think it’s the best way to eat a cupcake! First, I rip off the bottom of the cupcake and I place the bottom (up-side-down) on top the icing. That creates a cake sandwich with the icing in the middle. It’s less messy that way. Otherwise, I might look more like Caleb does in the picture above! 🙂 But my teens seem to think that I’m a lunatic for eating cupcakes that way! Oh, well, I guess I might grow out of it someday! But I didn’t today! 🙂 God bless you all and I hope you have a wonderful week! ~JenMarie
- Snow Mary and Grotto
I was about to share this on my family blog, but then I thought you all might like to see it here, since it is a Catholic inspired idea…Over the past few days, we were blessed with over 18 inches of snow. My oldest daughter, Rachel, and a few of my younger daughters, Elizabeth, Hannah, and Abby, made this amazing Mary and grotto out of snow! The grotto stands about 5 feet high! I think Mary looks cuter in real life than she does in this photo. It can be so hard to get a good picture of snow. The girls also made snow-flowers and put them at Mary’s feet along with a few evergreen branches. I was shocked when I looked out my window and saw this huge grotto in the yard! They did an amazing job! I asked Rachel if they could make it again with concrete, because I’ll be so sad to see this melt. Although I sure am looking forward to spring! Personal Update: I really don’t have an update. But since some of you were asking if everything is okay, I thought I’d let you know that I was unable to get to the doctor’s yesterday (Friday) due to the snow. The doctor was going to tell me the results of the test, but the appointment was postponed till Monday. Hopefully we won’t get any snow on Monday, too! Yup, I’m soooo ready for spring! Have a blessed day! ~JenMarie
- Responsibility Chart for Catholic Kids {Chore Chart}
I wanted to share a child’s responsibility chart that I made for my younger kids. It’s not exactly “Catholic” except for the prayer section, but since I feel prayer is the most important part of this chart I thought some of my fellow Catholic moms might like to see and maybe even use it. Yes, I called it a responsibility chart, but you could also call it a chore chart. Personally, I think the word “chore” sounds so unfriendly compared to “responsibility”, but you are welcome to call it a “chore chart” if you want! 😉 If you think that name change was bad, you should hear some of the titles we say to replace the word “school”!! My kids grumbled at me one day when I said “Time for school.” So to make them laugh I started trying to make up titles to use instead of “school”. It made them laugh for a day, not so much anymore. What do you think of these new titles for school? – “Learning Love”, “Brain Juice”, “Mental Enhancement”, “Educational Play” and my personal favorite, “Anti-Starvation Preparation” (That one is referring to getting a job when they are older so they can buy food.). Sorry for the tangent, back to the chart … I tried to make this chart usable for kids who are not able to read. So I have a picture for each section to help remind the kids what they should do. That way they don’t need to ask me to read it each time they look at it. The chart includes: combing hair, making bed, brushing teeth, praying, general clean-up and much more! I also have listed “Read with reading buddy.” which is just a reminder to have my older kids read with the younger kids. My kids each have a “reading buddy” – that makes things a little easier on me. But if you only have young kids then mom, dad, and/or grandma can be the child’s “reading buddy”.As for the school section on the chart, (Yes, I titled it “school” not “Educational Play”) I have extra charts just for school subjects that the kids refer to. The younger kids’ school chart includes simple concepts like colors and letters, while the older kids’ charts have more advanced topics like reading and math. I laminated these for my kids, one for each -except my older kids. Yes, of course, I expect my older kids to comb their hair, pick up their toys, etc. – I just didn’t make them a chart for it! Although some days I think I need to! 😉 After the chart was laminated I added magnets to the back so we could hang them on the fridge! That works really well for us! We use a dry erase marker to check off what they have completed each day. Download the Chore Chart Here: Dry erase marker typically wipes off easily, but if your laminated sheets begin to get messy looking from the dry erase markers, just use a napkin and a few drops of rubbing alcohol to wipe the sheet off. That will normally make it look almost like new! Personal Update: SHOCKING NEWS! I did get to the doctor to get the test results about the lump/cyst which they removed last week. I’m not sure if the news is good or bad, but it was NOT something I wanted to hear. I have endometreosis ! I was truly shocked! Well, it could be a lot worse, but sadly, my pain is not going away anytime soon. It looks like I’ll just need to figure out a how to live with it. Thank you, everyone, for your prayers, comments, emails, and support! It has been so nice knowing I have such a great group of people praying for me and supporting me on this journey. Thank you, again. ~JenMarie
- Tea with the Blessed Mother
Hi Everyone! I LOVE May! It’s so beautiful! The flowers, the trees, the sunshine and NO snow to shovel!! It’s just so nice! Aside from being a beautiful month it’s also the month that God placed me into the arms of my mother, and it’s the month that God adopted me as His daughter! Yes, I love May! One of the best parts of May are all the Marian events, because May is Mary’s month! A few years ago, my daughters (all 6 of them) and I decided Mother’s Day was a perfect day to have a fun little tea party in honor of our special mother, Mary. We called it, “Tea with the Blessed Mother”. While we like to do a few small things for most of the Liturgical Year’s Feast days, we often like to make our “Tea with the Blessed Mother” an extra special party! We have tea (or hot chocolate for the non-tea-lovers), Marian themed treats, Marian crafts, we make a BIG Mary altar, and we have lots and lots of decorations! We also invite the Grandmothers, too. My girls LOVE it! It’s a fun Mother’s Day event! If you are planning to have a nice party for Our Lady, here are a few of the things we do. – These are older photos — I wanted to post this two years ago, but as much as I love May, it’s also the busies month for me. I’m wrapping up the school year and getting portfolios ready to send to our evaluator and school district. So, these ideas and files are ones we have used for several years now, and my girls seem to think of them as family traditions…. The Invitations: I “send” my girls invitations, they think it’s so neat! The excitement they show is more fun than the actual party! These are the invitations I “sent” to my daughters the past two years…. They are made with a card that I created, an 8 inch paper doily, and some curling ribbon. I recommend printing these onto stock paper or photo, but regular paper is okay. Download Tea Party Invitations and Tea Pot and Cup Décor: Decorations: A Mary Altar is a MUST! You can’t have a Mothers Day Tea Party without our Most Holy Mother!! This is our altar from two years ago. It was made using a mosquito canopy, fancy ribbons, strings of pearls, white roses, and large drop gem beads. Read more and see more pictures HERE . We also have a little Crowning for Our Lady. Learn to make a floral crown for Our Lady HERE . Here are a few “mini altars” that we had sitting around the dining tables and serving tables: I drew a few teapot and teacup pictures to use as decorations around the dinning room. They looked cute along the streamers and ribbons! The teapot has a small Immaculate Heart on the design! Download above. Here are a few pictures: The pot and cups are taped on a oblong paper doily and “fun-tacked” to the wall. The bow is made from purple paper and the teapot and cups were printed onto purple paper. The decoration in the picture above was created with the teapot/cup download, some tape and curing ribbon. I taped about 6 to 8 strands of ribbon to the teapot spout (on the back) and taped the cups to some of the ribbon strands. My girls added the “tea” color to the cups with a colored pencil. The colored teapots and cups above were simply printed on to colored paper. These cups may make great place-cards, too! I took all these pictures from the leftovers we had from last year. I hope to have nicer pictures after our party next Sunday. But I wanted to get this out so those who wanted to use them would have the chance to use them this May. Marian Crafts: Check out all the post about Our Lady HERE My girls and I are looking forward to our Mother’s Day tea party with Our Mother Mary! I hope all these ideas help you to share the love of Our Lady! Have a blessed May! ~JenMarie
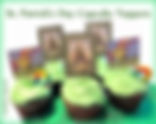
- Cupcake Toppers for St. Patrick's Day
Add a little Catholic flare to your St. Patrick’s day treats! Yes, I know it’s Lent, but how can you not celebrate such a great saint!! Actually, since St. Patrick’s Day falls so close to Sunday this year we are holding our celebration on Sunday – just so we can still stick with our Lenten sacrifices. Here are two different cupcake toppers to help decorate at your celebration, too!! Notice the cute little rainbows? They are just a few mini candy canes that we had leftover from Christmas. I stuck them into the cupcake to form the rainbow! The kids thought it was hilarious! The paper cupcake toppers are easy to make. Just cut out the images from the printable and tape the top half of a toothpick to the back. Then stick the bottom half of the toothpick into the cupcake! Easy fun! Download this style here: Download the rainbow Style Here: Hope you all a have a blessed Week! ~Jen-Marie
- Kids Sing for Jesus ~ CD Review
For almost 10 years my kids have been enjoying a CD called ”Kids Sing for Jesus” by the Renna’s. This adorable Catholic CD is full of fun and learning for Catholic kids. My teen girls, who were only about 5 when I bought this CD, still sing these songs! And their younger siblings are enjoying these cute songs today! I sure got my money’s worth out of that CD! 🙂 The Renna’s, who sing the songs on this CD, are a beautiful Catholic family! Mary Ann the mother of this talented family, started creating these songs to help a teacher teach a group of Catholic kids about the faith, and the idea just grew from there! The music is not only sung by the mother of the family but also the kids of the family (who are now much older). I found the story behind this family to be cute and worth reading, click here to read more (scroll to the bottom of the page -look for the music note on the left-side). The Renna’s also have a web page here . Today I wanted to share my thoughts on this CD, because I thought some of you would enjoy this as much as our family has! Perhaps you’d like to purchase one for an Easter basket! It would also be great a CD for a CCD/RE/religion class, Bible camp, homeschool family, Christmas, or any occasion! You can visit their site to hear a short clip from the songs on this CD { Click Here } Click on the little symbols beside the song titles. Then you can decide for yourself if you think you and your kids would like these songs. -My kids sure do enjoy them! 🙂 Click Here I hope your kids enjoy them, too!
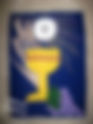
- First Communion Banner {Number 1}
I thought some of you might like to see the banners that my kids had done for their First Communion. This banner is one that was done by my oldest daughter, Rachel, 6 years ago. The background and all the parts I helped her cut out from various colors of soft felt, but she did most of it herself. At the time she LOVED sewing, so she did a lot of sewing on her banner. She used the string that you would use for cross-stitching. Rachel first sewed the rays of light that are coming from the host. Next, she sewed on the host and wheat. The lines you see on the wheat and the cross on the host are her large stitches. The stems of the wheat we hot glued down. She then sewed on the Chalice. We hot glued on the red string of sequins. She sewed on the grapes, which were just purple circles. The leaves were hot glued on and the leave’s veins she sewed. We also hot glued on some blue strings of sequins to the top and bottom of the banner. The front may be beautiful, but the back is a mess! Since she used a softer felt on her banner (because she was sewing) we had to hot glue stiff cardboard across the top on the back. We also hot glued the string to the cardboard so she could hang it up. She was very proud of her banner, but she was rather tired of sewing by the time she was done! Want to see more banners? Click here to see banner #2 Click here to see banner #3 Looking for a few templates? You could use the printable from my Eucharist Art project God Bless!~Jen-Marie